
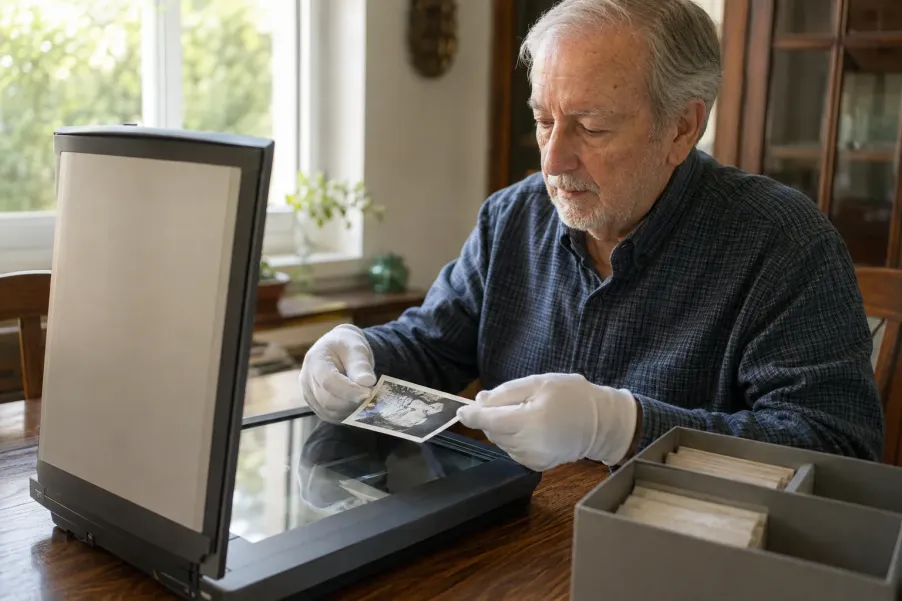
Prepare for a family photo scanning session by choosing a small, clearly labeled batch; handling each original by its edges; deciding on file names and scan settings before you begin; and checking every saved image before packing the photographs away. Keep the originals, make more than one digital copy, and stop if an item is fragile, stuck, curled, or difficult to flatten safely.
What makes a photo scanning session successful?
- A manageable batch with one simple purpose, rather than an entire family archive spread across the room.
- Careful handling that protects the original print before, during, and after scanning.
- File names and folders that another family member can understand without opening every image.
- A quality check and backup routine completed before the session is considered finished.
Scanning family photographs can make everyday sharing easier and reduce repeated handling of treasured originals. It also creates a practical reason to identify people, places, and dates while someone still remembers them. The goal is not to make every scan perfect in one sitting. It is to create a careful, repeatable process that protects the photographs and produces files the family can find again.
Older adults may prefer a slower session with fewer decisions on the screen, a comfortable chair, good lighting, and a helper who follows their naming choices. A family member can operate equipment without taking control of the collection. Decide together who handles originals, who enters file names, and who confirms the backup.
What should you decide before scanning?
Give the session one concrete purpose. You might scan ten photographs for a family birthday, preserve one small envelope from a particular year, or create copies to share before a video call. A narrow goal makes it easier to finish the complete cycle: select, scan, name, review, back up, and return the originals to storage.
If a box is difficult to navigate, sort printed family photos without losing their stories before selecting a scanning batch, keeping original groups, enclosure identifiers, and storage locations connected in a finding list.
Write the naming pattern and folder name on a separate session note, not on the photographs. Decide where the finished files will go and who may receive a copy. If several relatives will help identify people later, the family video call practice guide can help you test the call and screen-sharing routine before bringing out irreplaceable materials.
A useful session goal
“Today we will scan the twelve loose photographs from the blue envelope, use the same year-event-number file pattern, check each image at full size, copy the finished folder to a second drive, and return every original to the envelope in the same order.”
How do you choose a manageable batch?
Start with loose, ordinary prints that lie flat and appear stable. Choose items of similar size when possible so the scanner setup does not change constantly. Keep the selected batch in its existing order. A small numbered separator or an inventory note can record the sequence without writing on the photographs.
A photograph may bring a memory to mind before scanning begins. If the storyteller would like to talk about it, use the guide to share one family story in a short conversation to choose one event, leave uncertain details open, and agree what may be saved or shared.
Set aside albums, framed photographs, negatives, slides, oversized prints, brittle mounts, curled items, and anything stuck to glass or another surface. These may need different equipment or professional conservation advice. The U.S. National Archives cautions that a scanner lid can crush an item that does not fit and that automatic-feed scanners can tear fragile, weak, or bent originals.
Select
Choose one envelope, event, branch of the family, or other small group with a clear stopping point.
Count
Record how many originals are in the batch so the same number returns to storage.
Separate
Pause damaged, unusual, or difficult items for a different workflow instead of forcing them through this session.
Protect
Keep food, drinks, lotions, pens, tape, and loose cleaning liquids away from the work area.
How should you handle original photographs?
Use a clean, dry workspace and support each photograph with both hands when needed. Hold prints by their edges and avoid touching the image surface. The Library of Congress recommends clean, well-fitting cotton or nitrile gloves for photographs and film, while also emphasizing a clean work area and careful handling. Loose or oversized gloves can make fingers less precise, so stop if the glove itself creates a dropping or bending risk.
Do not trim a print, peel it from a mount, flatten it with heavy objects, erase a note, or repair it with household tape or glue. Do not use water, solvents, heat, or a damp cloth on the image. If a photograph is moldy, wet, flaking, cracked, tightly curled, or stuck to another material, isolate it from the scanning batch and seek preservation guidance before handling it further.
Ready for this session
The print is loose, dry, stable, comfortably smaller than the scanner glass, and can lie flat without pressure.
Pause and ask
The item is mounted, unusually valuable, tightly curled, oversized, or difficult to identify or orient.
Do not force it
The image is stuck, wet, moldy, cracked, flaking, or likely to be damaged by a lid, feeder, adhesive, or flattening.
What belongs in a senior-friendly scanning workspace?
Place the scanner on a stable table with room on one side for the unscanned batch and on the other side for completed items. Use a supportive chair and bring the work close enough that no one must reach across the glass. Reduce glare without darkening the room. Keep power and data cords outside walking paths.
Clean the scanner only according to its manufacturer or facility instructions before photographs enter the area. The Los Angeles Public Library photo-scanning workflow uses an anti-static cloth and air puffer for its equipment and instructs users to handle photographs by the edges. Do not improvise with spray cleaner over open originals.
If someone is helping, agree on short, specific roles. One person can handle photographs while another operates the scanner and reads file names back aloud. The technology help session checklist offers a useful way to define the task, protect private accounts, and finish with an understandable handoff.
Which scan settings should you choose?
Scan settings depend on the original, the equipment, and how the files will be used. Color mode can preserve subtle information even in an older black-and-white print. Resolution determines how much detail is captured and how large the file becomes. File format affects quality, compatibility, and storage space.
For the equipment in its posted Memory Lab workflow, Los Angeles Public Library suggests 24-bit color and a resolution of at least 600 for photographs, then offers JPEG or TIFF as file choices. Treat those as instructions for that workflow, not a promise that every scanner uses identical labels. Follow the current instructions for the exact device or facility.
Preservation master
Use the facility or scanner’s recommended high-quality format and setting when you want a durable master for future copies.
Everyday sharing copy
Create a smaller, common-format copy from the master when convenient email, messaging, or viewing is the main need.
When uncertain
Scan one ordinary sample, save it, open it, inspect it, and confirm the file size before processing the full batch.
Do not spend the whole session debating advanced settings. Choose a documented starting point, test one scan, and keep the same settings for similar photographs. If the first file cannot be opened on the intended device or is too large to store and copy reliably, adjust before continuing.
How do you name scanned photo files?
Choose a pattern that sorts naturally and does not depend on perfect memory. A useful structure is approximate year, short event or subject, and a three-digit sequence, such as year-family-picnic-001. If the date is uncertain, say so in the folder note instead of inventing one. The National Archives recommends simple alphanumeric identifications, hyphens or underscores instead of spaces, and basic who-what-where-when metadata.
Keep names short enough to read and consistent within the batch. Do not put private account numbers, health details, legal disputes, or other sensitive family information in a file name that may appear in previews or shared folders. Record longer stories in a separate family note that refers to the image’s file name.
If knowledge is divided among relatives, assign the unknowns rather than guessing. The family visit handoff method can be adapted into a small follow-up list: who will identify a person, who will confirm a year, and who will receive the final folder.
What should you check after each scan?
Open the saved file rather than trusting a thumbnail. Confirm that the entire photograph is visible, the orientation is correct, edges are not cropped, faces and details are reasonably sharp, and no dust, hair, glare, or unintended reflection dominates the image. Zoom in enough to detect a scanning problem, but do not confuse damage already present on the original with a failed scan.
Compare the file name with the original before moving to the next item. If several photographs were placed on the glass together, confirm that the software created the expected separate files and did not cut through an image. Repeat a scan immediately when the fix is simple; place a difficult item in a clearly named review group instead of losing the whole session to one photograph.
- The file opens on the intended computer or tablet.
- The complete print is visible and oriented correctly.
- The name matches the session pattern and sequence.
- The visual quality is good enough for the stated purpose.
- The original moves to the completed side without changing the batch order.
How should you back up scanned family photos?
A scan is not protected merely because it exists on one USB drive, laptop, or cloud account. The National Archives describes a 3-2-1 approach: keep three copies, on two different kinds of storage, with one copy located off-site. Choose a version of that principle your household can maintain and explain.
Before ending the session, copy the completed folder to the planned second location, open a few files from that copy, and record who is responsible for the off-site copy. Safely eject removable storage. Then return every original to its envelope, sleeve, album, or box in the original order. Digitizing helps access and sharing, but the National Archives specifically advises keeping the originals because digital files can also be lost.
For a family history project, keep the scan folder connected to the research question. The local history research visit guide explains how to organize names, places, dates, and source questions before visiting an archive or library.
Where can Los Angeles residents get scanning guidance?
Los Angeles Public Library currently operates a DIY Memory Lab at Central Library for digitizing photographs and other formats. Its public page says users need a LAPL library card, an online orientation, a signed Octavia Lab User Agreement, and a reservation. Confirm current eligibility, hours, equipment, accessibility, orientation, file-storage requirements, and reservation availability directly with the library before traveling.
The Memory Lab is a City of Los Angeles resource. Residents elsewhere in Los Angeles County should ask their own library system whether it provides scanners, preservation equipment, technology assistance, or referrals. Do not assume that a regular document feeder is safe for photographs. All Seniors Foundation can help older adults and families navigate general support information, but it does not conserve originals, operate the Memory Lab, or guarantee equipment access. Browse the Senior Support Guides for related planning resources.
Official photo scanning and preservation sources
- Los Angeles Public Library: The Memory Lab for the current local facility description, orientation, agreement, card, and reservation path.
- Los Angeles Public Library: Scan Photographs for its equipment-specific preparation, handling, preview, settings, naming, saving, and closeout workflow.
- U.S. National Archives: Digitizing Family Papers and Photographs for safe equipment boundaries, file naming, basic metadata, backups, and keeping originals.
- Library of Congress: Photograph Preservation FAQ for careful handling, clean fitted gloves, storage materials, display copies, and damaged-photo boundaries.
Equipment, formats, settings, library access, and preservation needs vary. Confirm the current procedure for the exact scanner and facility. Stop when an original is fragile or difficult to handle, and consult a qualified conservator for valuable or damaged materials.
Frequently asked questions
Should I scan every family photograph in one session?
No. Begin with a small, clearly defined batch that you can select, scan, name, review, back up, and return to storage. Finishing ten well-organized images is more useful than leaving hundreds of originals and unnamed files scattered between stages.
Do I need to wear gloves when scanning photographs?
The Library of Congress recommends clean, well-fitting cotton or nitrile gloves for photographs and film. Gloves should not reduce your control. Keep the work area clean, hold prints by their edges, and stop if handling feels uncertain.
Can I use an automatic document feeder for old photos?
Avoid automatic feeders for fragile, weak, bent, valuable, or irreplaceable originals because a jam can tear them. Use a suitable flatbed or preservation workflow, make sure the item fits, and follow the exact equipment instructions.
Should I save family photo scans as JPEG or TIFF files?
The right format depends on the equipment, storage, and purpose. A high-quality master can support future copies, while a smaller common-format copy may be easier to share. Follow the facility’s workflow, test one file, and document the choice.
Can I throw away the original photos after scanning them?
No. Keep the originals after digitizing. Digital files can be deleted, corrupted, misplaced, or trapped on obsolete storage. Return each photograph to safe storage in the same order after confirming the scans and backups.
What should I do with a curled, cracked, moldy, or stuck photograph?
Remove it from the routine scanning batch and do not force, flatten, peel, clean, tape, or glue it. Protect nearby materials from contamination when appropriate and seek current preservation or professional conservation guidance before further handling.
Need help finding a practical support route?
All Seniors Foundation can help Los Angeles County older adults and families navigate general support information while leaving equipment access, archival handling, and conservation decisions to the responsible library, facility, or qualified professional.





